How to make leaf mold in bags
Save one bag of healthy fall leaves, give it moisture and air, and let time make a dark, crumbly amendment for next season.
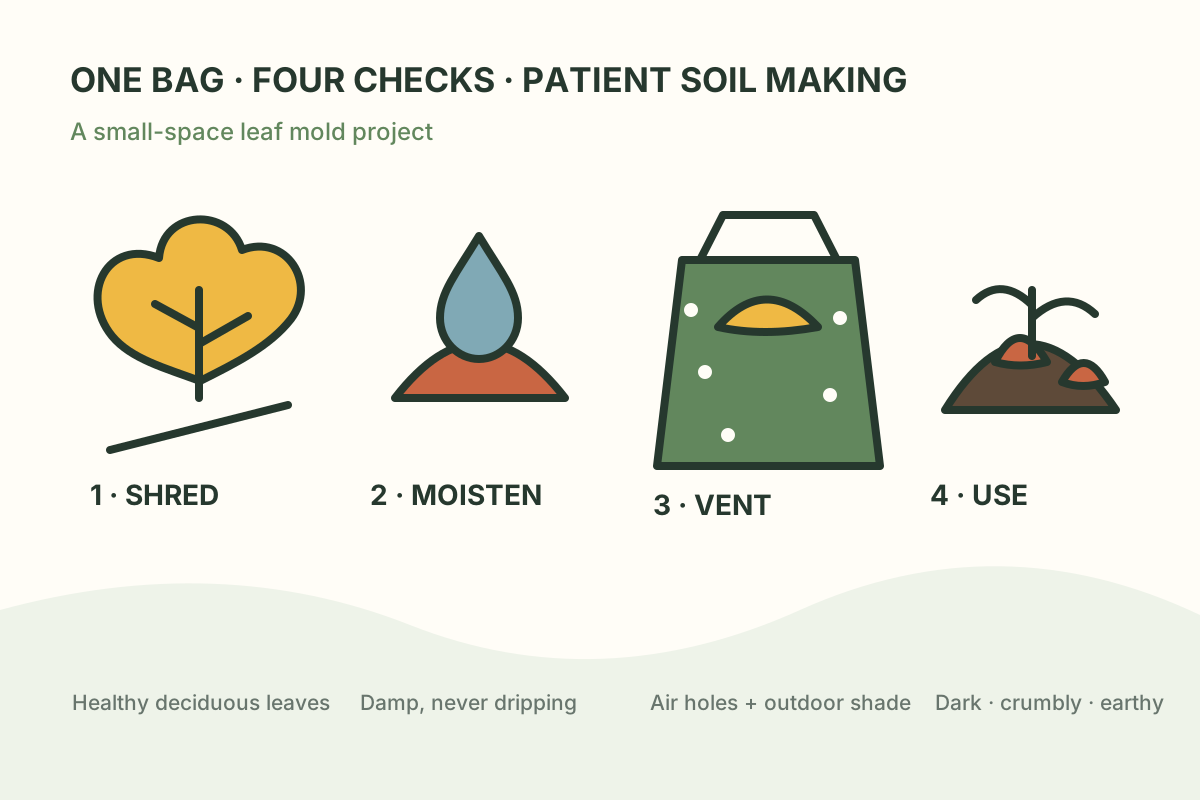
A leaf-covered yard can produce more brown material than one compost bin can use. A balcony or rented home may offer no room for a pile at all. One ventilated bag is a practical middle ground: it contains the leaves, takes little floor space, and creates a material that helps soil hold water and stay workable.
Leaf mold is not a quick fertilizer and it is not the same project as balanced compost. It is simply leaves decomposed until they are dark, crumbly, and earthy-smelling. Penn State Extension describes it as low in nutrients but useful for soil structure and water retention. That makes the project a good fit for gardeners who want to reuse a local material without promising instant fertility.
Start with leaves worth keeping
Use dry or slightly damp deciduous leaves from a place you know. Avoid leaves mixed with litter, road grit, pet waste, treated-lawn debris, or unknown contamination. Do not take leaves from a neighbor, park, or public collection point without permission.
Set aside obviously diseased leaves rather than concentrating them in a small bag. Penn State Extension advises bagging diseased garden material for disposal. A few grass clippings caught while mowing are not a crisis, but a bag dominated by fresh grass becomes a different, wetter composting recipe.
Do not strip woodland edges or dump extra leaves onto an existing natural leaf layer. Wildlife uses that layer for shelter and food. The point is to manage excess leaves from maintained spaces, not tidy habitat that is already doing useful work.
Choose the container before filling it
A reused heavy-duty plastic yard bag is the smallest setup. It should be sound enough to lift but need not be airtight. Make a series of pencil-width holes on the sides and near the bottom so air can enter and excess water can escape. Illinois Extension specifically recommends small holes throughout a leaf-storage bag.
If plastic bags are prohibited where you live, use a lidded trash can with ventilation and drainage holes or a small wire cylinder. Whatever the container, confirm building and municipal rules first. Never store a damp organic project indoors, in a living space, or where leaking liquid could stain shared surfaces.
The four-step bag method
- Reduce the leaf size. Shredding is optional, but it increases exposed surface and shortens the wait. Run dry leaves through a mower where safe and permitted, or crumble a modest batch by hand while wearing gloves. Skip the mower if stones, sticks, wire, or hidden debris are present.
- Moisten evenly. Add leaves in loose layers, misting as you go. Aim for the feel of a wrung-out sponge: damp throughout, with no stream of water when squeezed. Dry centers barely change; saturated leaves lose air.
- Close loosely and label. Tie the bag loosely or fold the top without making an airtight seal. Write the leaf source, start date, whether the leaves were shredded, and the next check date on a durable label.
- Store outdoors in shade. Put the bag in a permitted, shaded or lightly sheltered place where temperature and seasonal moisture can vary naturally. Stand it on a surface that can drain. A tray that holds standing water defeats the drainage holes.
Ground contact can introduce decomposer organisms and may speed the process, but it is not essential for a renter’s bag. Good starting moisture, airflow, smaller pieces, and patient checks matter more than pretending there is one perfect location.
Use a seasonal check, not a weekly chore
This is a slow project. Checking every week usually adds work without improving the result. Inspect after the first month, then every month or two and after unusually hot or dry weather.
| What you find | What it suggests | What to do |
|---|---|---|
| Leaves are crisp and unchanged | The center is too dry | Open the bag, add water in small amounts, mix, and retest by squeezing |
| Sour smell or slick, matted leaves | Too much water and too little air | Add more holes, mix in dry leaves, and leave the top looser |
| Earthy smell, shrinking volume, soft pieces | Decomposition is progressing | Check moisture, then close loosely and wait |
| Standing liquid | Drainage is blocked or the bag sits in water | Move it, open the bottom holes, and mix in dry material |
| Bag is splitting | Weathering or overfilling | Place it inside a ventilated outer container without sealing both layers |
White fungal threads can be part of normal leaf decomposition. Odor and texture are more useful signals than color alone. A pleasant woodland smell is reassuring; a persistent sewage-like or sour odor calls for more air and less water.
How long the bag needs
Penn State Extension says shredding, occasional turning, and occasional watering can reduce a years-long process to about 6 to 12 months. Illinois Extension reports about six months for shredded leaves and 9 to 12 months for whole leaves. Cold, drought, thick waxy leaves, or a forgotten dry center can extend that schedule.
Treat those numbers as planning ranges, not a harvest promise. A November bag may provide partially broken-down leaf mulch by late spring and finer leaf mold later in the year. If recognizable leaf pieces remain, use the material as surface mulch or return it to the bag rather than forcing it into a delicate seed-starting job.
Know when it is ready
Finished leaf mold is dark brown, loose to crumbly, and smells earthy. Most original leaf shapes are no longer obvious. A handful should feel moist and fibrous rather than sticky or greasy.
Leaf mold is useful around established plants, on garden soil, or as one organic component when refreshing a container mix. It is not sterile, it is not a complete fertilizer, and it should not replace a tested seed-starting medium. For pots, first use the health-and-drainage checks in our guide to reusing potting soil; then add only enough mature leaf mold to improve texture without making the mix dense.
For beds, use leaf mold as a surface mulch or incorporate a modest amount when the soil is workable. Do not bury thick layers of partly decomposed leaves against plant crowns. If your immediate goal is winter protection rather than next year’s amendment, follow the fall soil-cover guide.
Print or copy this bag label
Photograph the completed label in case weather removes the writing. A simple record will tell you whether shredding, moisture, or placement made the biggest difference when you repeat the project.
Leaf mold or compost?
Choose leaf mold when you have mostly leaves, limited space, and time. Choose a balanced pile when you have a steady mix of dry carbon-rich materials and fresh nitrogen-rich materials and can manage moisture and turning. Our first compost-bin guide explains that active process. An indoor worm bin is another distinct system for measured food scraps; it should not become storage for bags of fall leaves.
The best system can also use both. Keep one leaf-mold bag intact, and save a second small supply of dry leaves as “browns” for future compost additions. That prevents a fall surplus from becoming a spring shortage.
Three common questions
Does the bag need air holes?
Yes. Make small holes around the bag and close it loosely. Leaves need moisture, but a sealed, saturated bag encourages the sour, slimy conditions that small-space gardeners are trying to avoid.
Can oak leaves become leaf mold?
Yes, but thick or waxy leaves may break down more slowly. Shredding helps. Do not assume the finished material will make soil dangerously acidic: Oregon State Extension describes partially decomposed leaf mold as near-neutral, while the soil’s actual pH should be measured rather than guessed from the tree species.
Can I use it in seed-starting mix?
Not as a substitute for a clean, fine, well-drained seed-starting medium. Homemade leaf mold can vary in maturity and texture and is not sterile. Use it around established plants or as a considered component of a mature container mix.
Sources
Reviewed November 9, 2026. Local waste, lease, fire-safety, and horticultural guidance should shape the storage method.
- Penn State Extension — Leaves Are Treasure, Not Trash.
- University of Illinois Extension — Recycling Your Leaves.
- University of Illinois Extension — Don’t Bag Your Fall Leaves, Use Them.
- University of Minnesota Extension — Fall Leaf Mulching Is Good for Your Lawn.
- Oregon State University Extension — Mulching Woody Ornamentals with Organic Materials.
- Penn State Extension — Fall Garden Tasks.
Questions about dry bags, sealed wet bags, airflow, and readiness were also reviewed in public gardening discussions; recommendations above rely on Extension sources.